|
|
| Line 13: |
Line 13: |
| |
|minlevel=59 |
|
|minlevel=59 |
| |
|reclevel=62 |
|
|reclevel=62 |
| − |
|mid boss=??? |
+ |
|mid boss=none |
| |
|end boss=[[Warrior Kazgulam]] |
|
|end boss=[[Warrior Kazgulam]] |
| |
|maxcores=2 |
|
|maxcores=2 |
| Line 61: |
Line 61: |
| |
{{:Warrior Kazgulam|template=Monsters Found|Boss|[[Sewers]]}} |
|
{{:Warrior Kazgulam|template=Monsters Found|Boss|[[Sewers]]}} |
| |
{{:Lizardman Warrior|template=Monsters Found}} |
|
{{:Lizardman Warrior|template=Monsters Found}} |
| |
+ |
{{:Lizardman Assassin|template=Monsters Found}} |
| |
+ |
|
| |
|
|
|
| |
}} |
|
}} |
Revision as of 13:48, 11 August 2011

|
This article is incomplete and may require expansion and/or cleanup.
Please improve the article or discuss the issue on the talk page.
|
<- Back to Sewers
<- Back to Boats
|

|
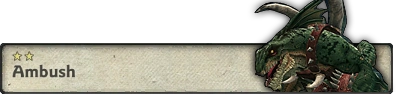
| “
|
The Pontiff was supposed to pass this way on his way to Rocheste, but he hasn't yet. Go investigate.
|
„
|
|
|
~ Gwynn on Ambush
|
|
|
| Battle given by:
|
Gwynn
|
| Related stories:
|
...
|
|
|
Template:Monsters Found
|
|
|
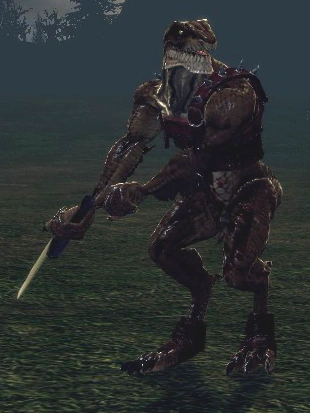
| Lizardman Warrior
|
|
|
| Type
|
Lizardman
|
| Location
|
Sewers
(Mob of [[]])
|
| Alignment
|
Aggressive
|
| Season
|
Season 1
|
Stats
| Normal / Hard Mode |
|---|
Level: 61 Exp: 357
HP by Group Size -
1: 3,150
2: 3,1503: 3,150
4: 3,150
Att: 8,462
Def: 5,306
Crit: 42
Res: 40
CritDmg: 120%
|
| Hero Mode |
|---|
Level: 61 Exp: 357
HP by Group Size -
1: 12,600
2: 12,6003: 12,600
4: 12,600
Att: 13,462
Def: 12,204
Crit: 42
Res: 40
CritDmg: 120%
|
Related Titles
Drops
Regular Drops
Quest-Only Drops
Battle Skills & Attacks
Tips & Advice
Additional Notes
Image Gallery
|
|
|
| Lizardman Assassin
|
|
|
| Type
|
Lizardman
|
| Location
|
Sewers
(Mob of [[]])
|
| Alignment
|
Aggressive
|
| Season
|
Season 1
|
Stats
| Normal / Hard Mode |
|---|
Level: 60 Exp: 335
HP by Group Size -
1: 1,794
2: 1,7943: 1,794
4: 1,794
Att: 8,090
Def: 5,036
Crit: 36
Res: 39
CritDmg: 120%
|
| Hero Mode |
|---|
Level: 60 Exp: 335
HP by Group Size -
1: 7,176
2: 7,1763: 7,176
4: 7,176
Att: 13,090
Def: 11,583
Crit: 36
Res: 39
CritDmg: 120%
|
Related Titles
Drops
Regular Drops
Quest-Only Drops
Battle Skills & Attacks
Tips & Advice
Additional Notes
Image Gallery
|
|
|